Get 10% off your first order

Hot


Double-sided Wax Seal Stickers (10 Pack)
$1.95
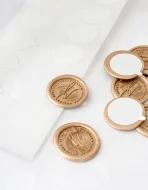
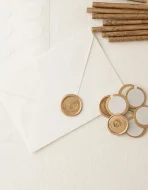
Prepare your wax seals in advance by adding a 3M adhesive backing to the reverse side for efficient application to envelopes or projects. These 23mm stickers complement 25mm wax seal stamps.
Pour and stamp onto our wax seal mat, let it cool, peel off, and attach the adhesive backing. This method is ideal for batch-making seals, ensuring a polished look without the stress of perfecting them on the first try. Avoid the hassle of pouring wax directly onto soft surfaces and use the tabbed corner for easy removal of the adhesive backing.
Available on back-order

Please note, colours shown are not always an accurate representation of the true colour, as screens may display colours differently. If you're concerned, please get in touch and we'll help!
Description
Description
Paper Alchemy’s Double-sided Wax Seal Stickers are handmade in our Sydney studio — real sealing wax poured, stamped, and cooled, then fitted with a 3M adhesive backing on the reverse. They come in packs of 10, measure 23mm in diameter, and are designed to complement a 25mm wax seal stamp impression. Both faces of each seal are fully finished — there are no raw or unfinished edges on the reverse.
What Are Wax Seal Stickers? Real Wax, Not a Printed Sticker
Wax seal stickers are not printed paper stickers that look like wax. They are genuine sealing wax seals — poured from real sealing wax into a mould or onto a silicone mat, stamped with a seal die while still warm, and allowed to cool completely — then fitted with a self-adhesive backing. The result is an authentic wax medallion that looks and feels identical to a hand-poured seal applied directly onto an envelope, but with the convenience of a peel-and-stick application.
The distinction matters because it is the difference between a detail that reads as luxury and one that reads as printed decoration. When a guest looks closely at a wax seal sticker from Paper Alchemy, they see the same depth, texture, and impression detail as a live-poured seal. The wax catches light the same way, has the same tactile quality, and carries the same visual weight.
Double-sided — Our Quality Difference
Many wax seal stickers are produced with a raw, unfinished reverse — the side that faces the adhesive is left as a rough pour surface. Paper Alchemy’s wax seal stickers are finished on both sides. The face carries your chosen design impression; the reverse is cleanly finished so that when the seal is lifted slightly or peeled back — as guests often do to examine a beautiful detail — there are no rough edges or manufacturing marks visible.
This is a meaningful quality distinction that reflects how our Sydney studio approaches accessories: the side you don’t expect to see should be as considered as the side you do. It also makes the sticker easier to handle during application — a clean reverse allows the 3M adhesive tab to attach fully to the wax surface without gaps or voids that can cause the sticker to peel away over time.
Peel, Press, Done — How to Apply Your Wax Seals
Application is straightforward. Clean the surface of your envelope flap with a dry cloth to remove any dust or moisture. Peel the adhesive backing from the tab corner on the reverse of the sticker — use the tab rather than peeling from the edge to avoid bending the wax. Position the seal centrally on the envelope flap and press firmly but gently from the centre outward, holding for 5–10 seconds to allow the adhesive to bond. Avoid pressing at the very edge of the seal, which can stress the wax at its thinnest point.
For large guest lists, a production-line approach works well: remove the adhesive backing from 10–20 stickers and lay them face-up on a clean surface, then work through your envelopes one by one pressing each seal into position. This is significantly faster than pouring wax directly onto each envelope and eliminates the timing pressure of working with molten wax. No open flame, no wax gun, no timing pressure.
Wax Seal Stickers vs DIY Wax Stamping — Which Is Right for You?
Choose wax seal stickers when: you have a large guest list (50+ envelopes), you want complete consistency across all seals, you are sending invitations through the post and want minimal variation between seals, or you prefer not to work with an open flame and molten wax during the assembly process.
Choose DIY wax stamping when: you want a fully custom design through a custom wax seal stamp designed in our Sydney studio, you are sealing a smaller number of envelopes where the handmade variation of each live seal adds to the character, or you enjoy the craft process as part of your stationery preparation.
Both options produce a genuine wax seal. The sticker method offers convenience and consistency; the live-stamp method offers maximum customisation and a more involved creative process. Many couples use PA’s stickers for the bulk of their send and keep a few custom-stamped live seals for the most special envelopes — the celebrant, immediate family, and close friends.
Our Colour Range
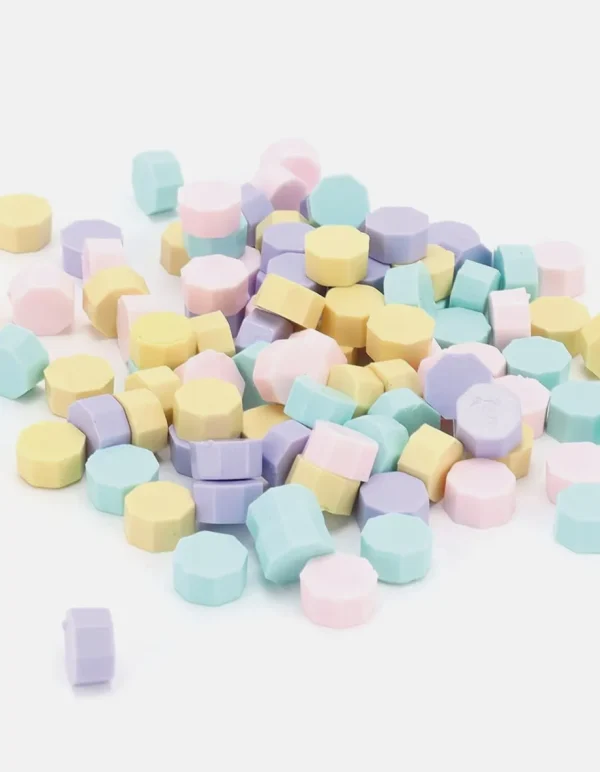
Paper Alchemy’s wax seal stickers are available in a curated range of colours coordinated with our broader wax seal and stationery palette. Colour options span classic gold, antique copper, ivory, white, blush, sage, dusty blue, charcoal, and black — the full palette is displayed in the product images. All colours are produced in the same double-sided, fully finished format.
When selecting a colour, consider your envelope colour and the tone of your invitation suite. A gold seal on an ivory or white envelope is the classic choice; dusty rose or blush on a white envelope suits romantic and garden aesthetics; charcoal or black on a dark envelope creates a tonal monochrome finish. Our team can advise on colour selection if you share your invitation suite details via the contact page.
Design Options
Paper Alchemy’s wax seal stickers are available in a range of existing designs from our studio — floral, botanical, monogram, and minimal geometric styles coordinated with our invitation collection aesthetic. These are curated designs that work across a wide range of suites and are available as pre-made stickers ready to dispatch.
For couples who want a sticker that matches a specific custom wax seal stamp design, get in touch via our contact page to enquire about custom design options. Custom design stickers require a longer lead time and minimum quantity — our team will advise on options during your inquiry.
Mailing Your Invitations — Will the Seal Survive Australia Post?
The 3M adhesive backing on our wax seal stickers creates a strong, reliable bond when applied to a clean, dry surface — this makes them more resistant to the mechanical stress of postal transit than a live-poured wax seal. However, for complete peace of mind, we still recommend hand-cancelling wax-sealed envelopes at the post office counter rather than allowing them through automated sorting machinery, and considering a plain outer envelope for long-distance or interstate sends.
The 23mm diameter is a practical size for postal applications — small enough to sit within the envelope flap without protruding beyond the envelope edge, which reduces the risk of the seal catching on other envelopes or postal equipment during handling. Position your seal at the centre of the envelope flap for the most secure and balanced result.
How Many Do You Need?
Wax seal stickers are sold in packs of 10. Calculate your quantity by counting your invitation send total, then adding 10–15% for application errors, any additions to the guest list, and a small supply for your own keepsakes. For a guest list of 80, order 9–10 packs (90–100 stickers); for 150 guests, 17–18 packs covers the send with buffer. Ordering all packs in a single order is recommended to ensure colour consistency across batches.
Pair Your Wax Seals with the Full PA Suite
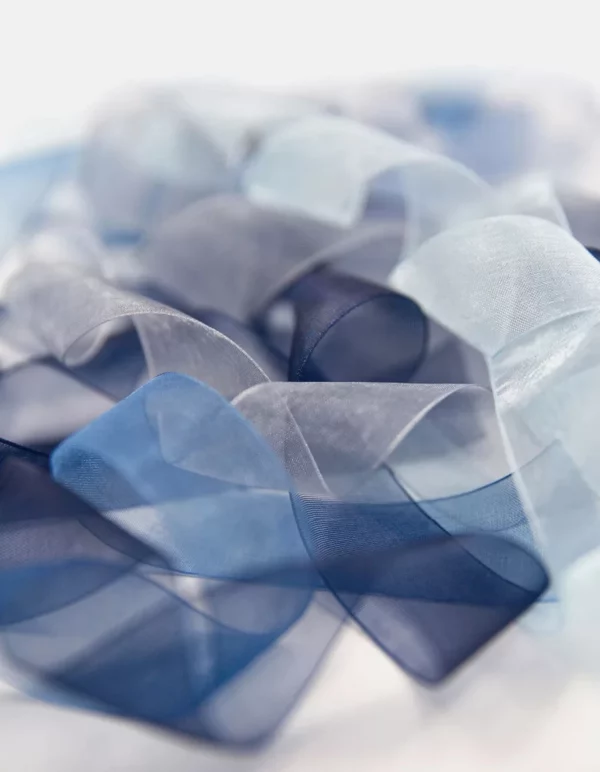
Wax seal stickers are one component of a considered stationery suite. Browse our full wax seals range for stamps, beads, and accessories; explore our envelope liners for a coordinated inside-the-envelope detail; and browse our sheer chiffon ribbon for a complementary tying detail on your invitation suite. For your envelopes, our invitation suite collections include coordinating recommendations across the full PA accessory range. Everything in the Paper Alchemy ecosystem is designed to work together — from a Sydney studio that has considered every detail of how a luxury invitation suite comes together.
What is the diameter of Paper Alchemy’s wax seal stickers?
Our wax seal stickers are 23mm in diameter. This size is designed to complement a 25mm wax seal stamp impression — the sticker is slightly smaller than the stamp die to account for the slight spread of wax at the perimeter of the pour. A 23mm sticker fits elegantly on the back flap of a C6 or C5 euro flap envelope without overlapping the envelope edge, and is proportioned correctly for most A5 and A6 invitation suites. If you are looking for a larger sticker to match a 30mm or 40mm custom stamp, please enquire via the contact page about custom size options.
Are wax seal stickers as authentic-looking as live-poured wax seals?
Yes — when made from genuine sealing wax (as ours are), wax seal stickers are visually and tactilely indistinguishable from live-poured seals to most observers. The impression detail, wax depth, surface texture, and light-catching quality of the wax are identical because the sticker is a real wax seal — the only difference is that it was poured and stamped in advance and fitted with an adhesive backing. The double-sided finish of Paper Alchemy’s stickers ensures there is nothing about the reverse that breaks the illusion. As with all handmade products, there is natural slight variation between individual stickers — this is a feature of authentic handwork, not a defect, and gives each seal its own character.
Can I apply wax seal stickers to surfaces other than envelopes?
Yes. The 3M adhesive backing bonds to most smooth, clean surfaces including paper, cardstock, vellum overlays, favour tags, gift boxes, and ribbon ties. For porous or textured surfaces, press firmly and hold longer — 15–20 seconds — to allow the adhesive to seat into the surface texture. Avoid applying to freshly printed or wet surfaces, as ink and moisture can prevent the adhesive from bonding fully. For high-humidity environments or outdoor applications, test adhesion on a sample surface before committing to your full quantity.
How to order

Step 1
Find your style
Browse our extensive collections and find a style you love, select the products you need, customise each product via the product options and purchase your beautiful invitation suite.

Step 2
We perfect it
After purchase, we’ll work with you to select and fine-tune the details like the card and ink colours, customise your text, and you’ll receive up to three rounds of revisions at no extra cost.

Step 3
Print & delivery
Once you're happy to finalise your design, we’ll send it to our production team then ship your items right to your door. If you'd like further information, visit our page on How it works.
Shipping & delivery

Shipping costs
Our shipping prices vary based on the type of product, order value, and shipping type. At the moment, we only ship to Australian addresses.
- For orders under $100, standard shipping within Australia costs $10.60.
- For orders over $100, standard shipping within Australia is free of charge.
- For all applicable orders, express shipping within Australia costs $19.95.

Customised products
Please note that all semi-custom and bespoke stationery products (such as invitation suites, on-the-day signage, etc.) and made to order items (such as wax seals) are subject to extended processing time since they are designed for you and made to order.
We can expedite processing and organise express shipping in most cases to shorten lead times. If you require a faster turnaround, please contact our team urgently to discuss how we can accommodate your deadlines.

Accessories
We offer expedited processing and express shipping across Australia for our in-stock accessories. Some items may experience extended shipping times (up to 14-28 days) however we have clearly marked these items to ensure that customers are aware of shipping delays.
Please rest assured that we are working closely with our delivery partners to ensure that we get your orders to you as quickly as possible.


Safety

Your safety is our top priority
Wax seal safety
We would like to remind you to exercise caution when creating your wax seals, as burns can easily occur when working with hot materials.
It is important to keep wax beads out of reach of children, as they pose a choking hazard.
Please note that the wax burner plate can become extremely hot during use, so it is important to handle it with care. Do not touch the plate area until it has fully cooled down.
Likewise, wax spoons can become very hot during use. To avoid injury, do not touch the heated end of the spoon while using it. Wait until it has fully cooled down before handling or cleaning it.
Thank you for taking these precautions to ensure your safety while using our products.
How to guide

Step 1
Use approximately 2–4 beads per wax seal
Experiment to see how many beads to achieve your desired look

Step 2
Slowly melt wax using a wax spoon over a candle or burner

Step 3
Once wax is melted, pour in a circular shape where required

Step 4
Press stamp into the wax and leave in place until the wax sets

Step 5
Carefully remove the stamp from your beautiful wax seal

Step 6
Don't forget to wipe your wax spoon clean and rinse in water when done
Take care as the spoon can still be hot!

Inspiration and suggestions
For some extra creative beautiful finishes:
- Try adding gold leaf flakes to the hot wax right before you stamp it
- Try melting more than one colour together and lightly swirl colours together with a toothpick
- Add petals or tiny flowers after pouring the hot wax but before you stamp it
- After creating your wax seal, you can use a metallic marker to highlight the design further
- Add a bit of glitter or metallic powder into the melted wax before pouring
- Add in a few tiny seed beads in different colours to the melted wax before pouring


Only logged in customers who have purchased this product may leave a review.



Reviews
Clear filtersThere are no reviews yet.